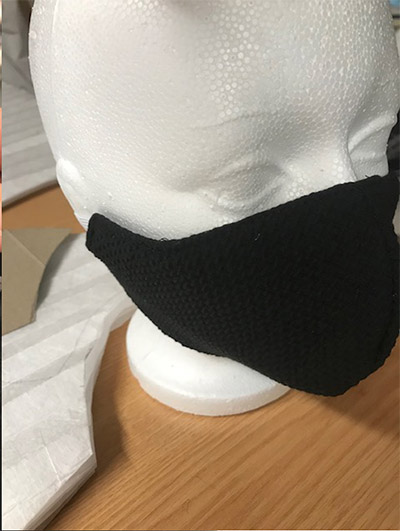
Cup Mask with Filter
Materials Needed
- Sewing Machine
- Scissors
- Acrylic Ruler
- Thread
- 100% cotton fabric
- Face Mask Pattern (PDF)
- Downloadable Instruction Sheet (PDF)
Note: It is important to use 100% cotton.
Make sure you prewash your fabric using a mild detergent and no fabric softener. This will help to shrink the fabric to prevent it from shirking later on after it has been sewn.
Step by Step Instructions
STEP 1
Print and cut the face mask pattern
Begin by printing the PDF pattern, download it to print 100% - no scaling. Cut out a total of four pieces of the pattern, you should have two sets of mirrored images. It is easier to cut onto a cardboard piece if cutting multiple masks.
STEP 2
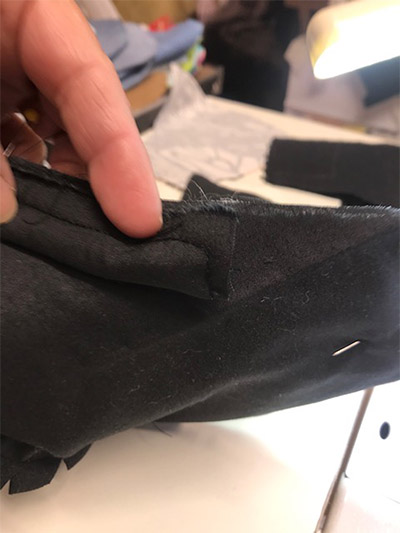
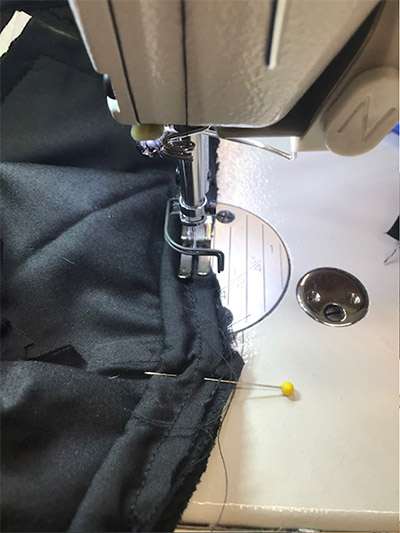
Pin and Sew Lining and Outside, Main Fabric
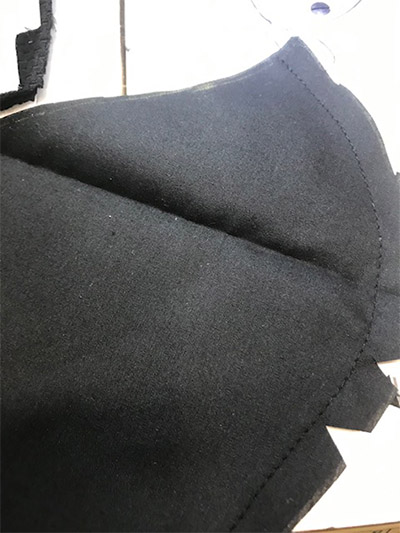
Place the mask pieces right sides together and pin along the outward curve of the fabric. Sew the seam with a ¼” seam allowance. Clip small notches (cutting close to, but not through the stitching) in to the fabric to reduce the bulk of the seam. Press the seam to the side.
STEP 3
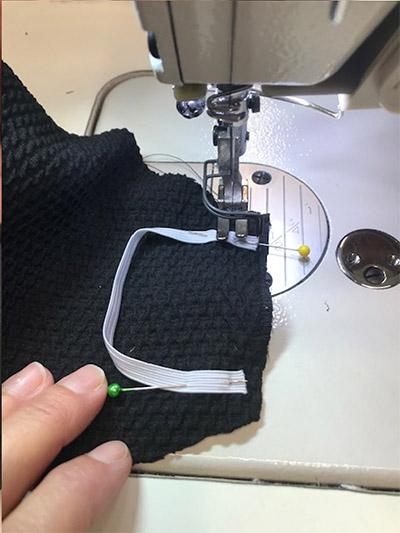
Cut and Sew Elastic
Cut two pieces of ¼"" elastic 8" long*
Or
To create a mask with elastic ear-holes cut two pieces of elastic 6" long.
Note: These numbers are suggestions, adjust using your own head as guidance – you can hold the elastic around your head (from the mask edge) to double check). Remember, different brands of elastic have a different amount of stretch.
Pin to the straight edge of the fabric, 3/8ths of an inch from the top. Repeat the same process along the bottom of the mask.
Sew around the entire mask using a 3/8ths inch seam allowance leaving a small 2" opening at the bottom (to insert an optional filter between the lining and the front fabric). Note: When you reach the corners of the mask, put your needle in the down position, lift the presser foot and pivot. This will help you to get nice, sharp corners.
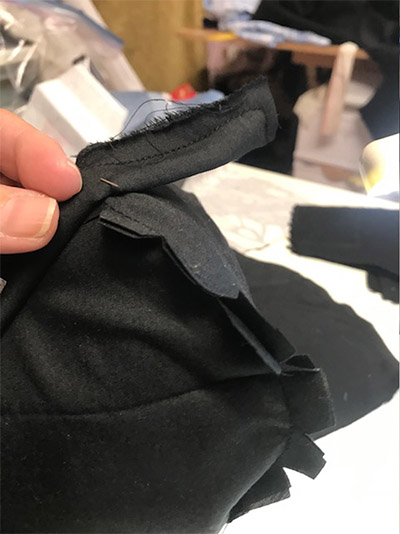
STEP 4
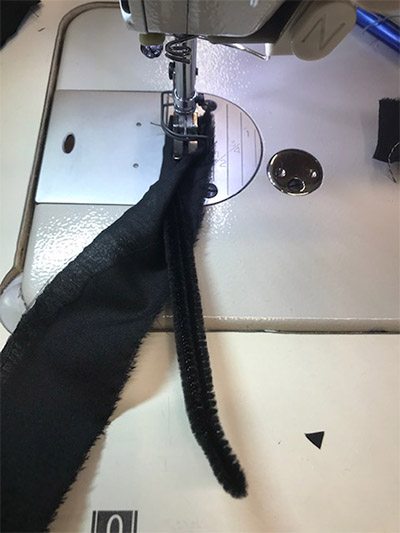
Create flexible nose with Pipe Cleaner
Cut a five inch piece of pipe cleaner – gently bend the ends in if the pipe-cleaner has sharp ends. Place the pipe cleaner along the seam allowance on top of the mask and pin it in place. Using a zig-zag stitch, sew slowly over the pipe-cleaner to secure it in place. Make sure to keep the pipe cleaner positioned in the middle of your presser foot so as not to hit it.
STEP 5
Turn Right Side Out
Turn the mask right side out by pulling the inside fabric through the 2" opening. Try grabbing the wire as you pull it to keep it from bending.
Press the mask taking care to tuck the sewing mask seam allowance along the bottom of the mask.
Hand stick or sew the 2" opening – both front and back of the mask, leaving the opening to insert the filter.

STEP 6
Make and insert the Filter
Cut two mirrored pieces of the filter 3/4" smaller than the mask pattern on all sides. Sew the filter pieces together in the curved centre and press the seam open.
Insert the filter inside mask through the 2" opening at the bottom.
Disclaimer: Homemade masks will not prevent someone from becoming infected with Covid-19. These are approved by the CDC to be used as a last resort when all other PPE options run out. Healthcare providers and frontline workers are experiencing shortages who have made masks can use them on lower-risk patients allowing the availabe N-95 masks to be reserved for emergency cases.
This page is in response to pleas from frontline workers and care-facilities for homemade masks.